Okay, here's my take: there is EXACTLY one good use case for "AI" in podcast production, and it is transcription. Early in my career, I was plagued by what I might call FOMT: fear of missing tape. At that time, full transcriptions were cumbersome and/or expensive. And because audio is so painfully and wonderfully real-time, every edit I made—with detailed notes, color-coded audio regions, or both—always left me in a kind of panic. It just always seemed like there was some key sentence I had overlooked, or put in exactly the wrong spot, and going back to the raw tape to find the answer would take me all day.
Needless to say, when I came across this Transom article about transcribing tape in 2017, I studied it like a sacred text. I think I have parts of it actually memorized.
Now, almost 9 years later, transcription (via AI) is built in to many audio and video editing programs, including Pro Tools and Descript. But those are big, expensive tools for complex projects, and there are some pieces of audio that I'm not necessarily planning on editing or incorporating into a larger narrative. For example, I've been trying to keep an audio journal lately, and it's nice to have a transcript that serves as a searchable record of what I've been blabbering about. (More on the specifics of that audio journal in another newsletter!)
For things like that, it turns out that you don't need an AI-slop generator, just a little nerdy computer knowledge.
Whisper to me
From what I can tell, almost all transcription software is based on Whisper, the audio transcription service from OpenAI. It shows up everywhere because it is open source, so developers can build it directly into their apps. I'm pretty sure it is Whisper that powers the transcription service in Pro Tools, for example, but there are also some indie developers making neat little Whisper tools.
One of my favorites is Transcriptionist ($20/year subscription), which lets you choose from various Whisper models to find the right balance of speed and accuracy. You can upload multiple files as part of an interview, and it can label the speakers. It also has a boatload of export options. If you can stomach another (pretty reasonable) subscription in your life, and you don't want to mess around on the command line of your computer, I think it is a nice tool to have in your toolkit.
But for those of you who do want to mess around on the command line of your terminal and use Whisper for free, I got you.
Getting Started
Command-line interfaces (CLIs) are tiny little programs that run in your computer's terminal. (On a Mac, there is a program called "Terminal" to access your terminal.) The best way to manage those tools is using a "package manager" like Homebrew. So, step 0 of this process is to install Homebrew following the instructions here. This downloads and installs some other tools that it needs to run, so that whole process might take a few minutes.
The Setup
Once you have Homebrew installed, you can easily install the two tools we'll be using for this workflow. The first is whisper-cpp, our transcription CLI. Install it in Terminal with brew install whisper-cpp. Whisper itself is an amazing tool, but for technical reasons that I don't even fully understand, it runs very slowly on Mac computers. whisper-cpp runs much, much faster, but it requires that your audio files are formatted in a very specific way.
This leads us to our second tool, ffmpeg (brew install ffmpeg). This little CLI is like a Swiss army knife of utilities for audio and video files. In our case, we will use it to make a copy of our audio file at the 16-bit specifications needed for whisper-cpp. Once the transcript is complete, we can delete that file, and we'll be left with our original.
Lastly, whisper.cpp needs a "model" to run; this is a big ol' file that is basically the brain of Whisper. There are a LOT of models out there, but before you get overwhelmed, let me just tell you that my favorite is large-v3-turbo, which is a newer one that is both fast and accurate. You can download it here; you'll have to scroll down a bit to find it.

Save that model someplace safe on your hard drive; we'll need the location of that for this next part.
The Recipe
Now what we need to do is string all of these tools together to create an "alias" in our terminal. You do this by updating a specific text file on your machine that can help make complex terminal commands simpler. In this case, we're going to reduce a long command into a single alias called "transcribe." Here's what you need to do.
- Open up your
.zshrcfile by opening Terminal and typingopen ~/.zshrc
If you get a message that the file does not exist, then you can create it by typingtouch ~/.zshrc
From there, run the open command again and a blank document should pop up - Copy and paste this text into the file:
export MODEL="/PATH/TO/YOUR/ggml-large-v3-turbo.bin"

transcribe()
{
 FILE=$1; ffmpeg -i "$FILE" -acodec pcm_s16le -ar 16000 "temp.wav"; whisper-cli -m $MODEL -otxt -osrt -of ${FILE:r} "temp.wav"; rm temp.wav
}
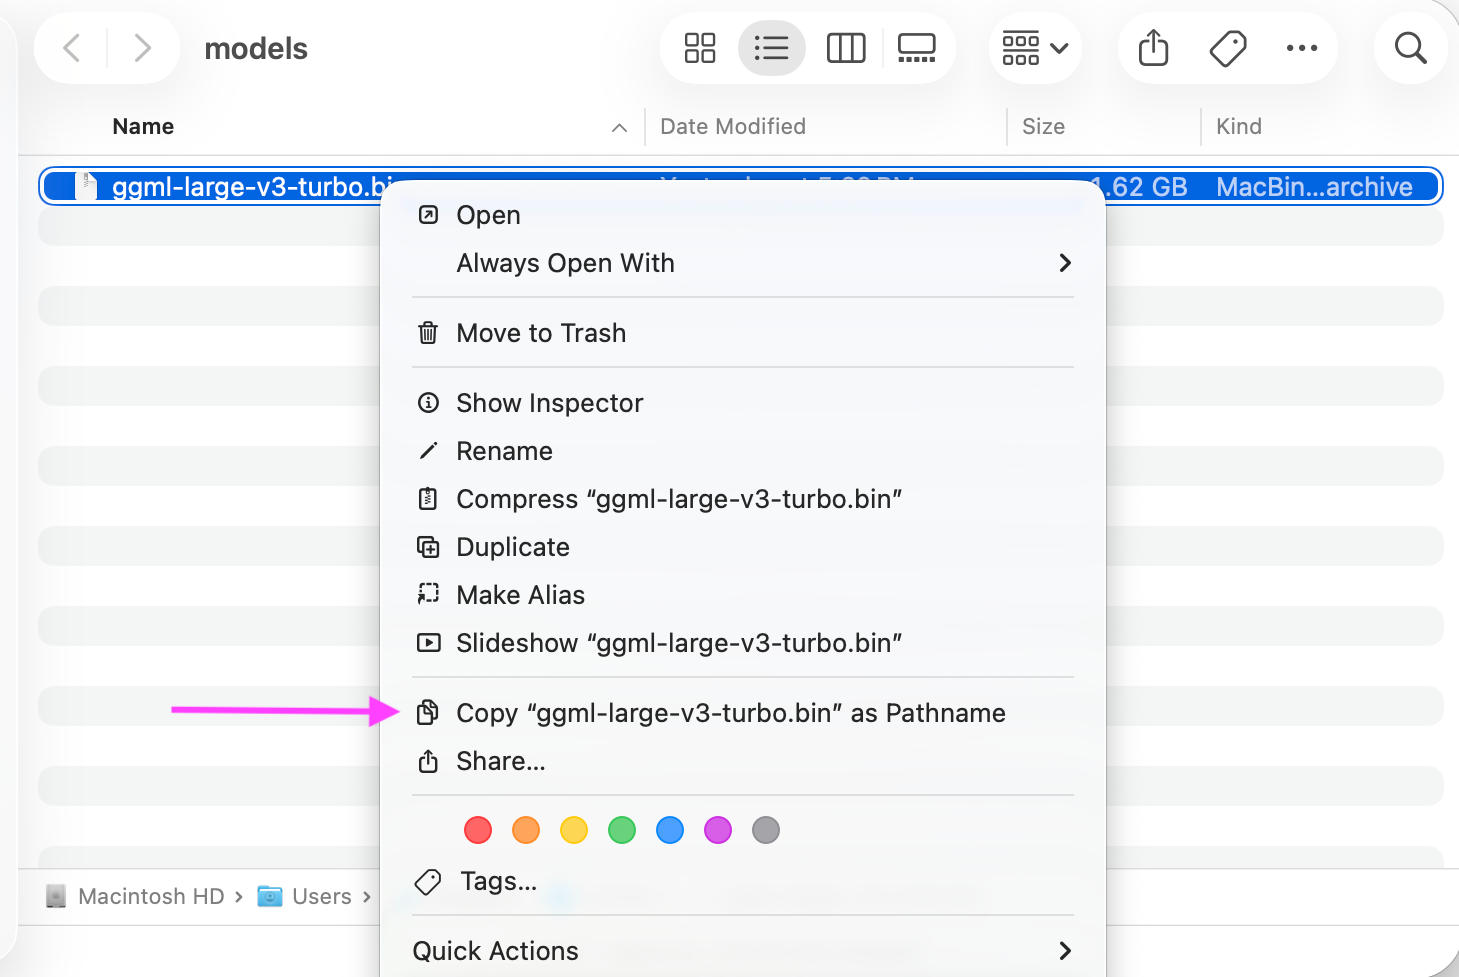
Now, see that line about the MODEL? Find the path to the model that you downloaded on your machine, and type or paste it in there. If you locate the model in your Finder, you can hold down the control key, click the file, then hold the option key. That will show you an option called "Copy…as Pathname." Do that, and paste it inside the quotation marks there.

Once everything looks good, save the file and close it. Then quit and restart Terminal.
The Workflow
With that all set up, every time you want a super quick transcription of a file, all you have to do is open Terminal, type "transcribe," hit the spacebar, and drag a file onto your Terminal window.
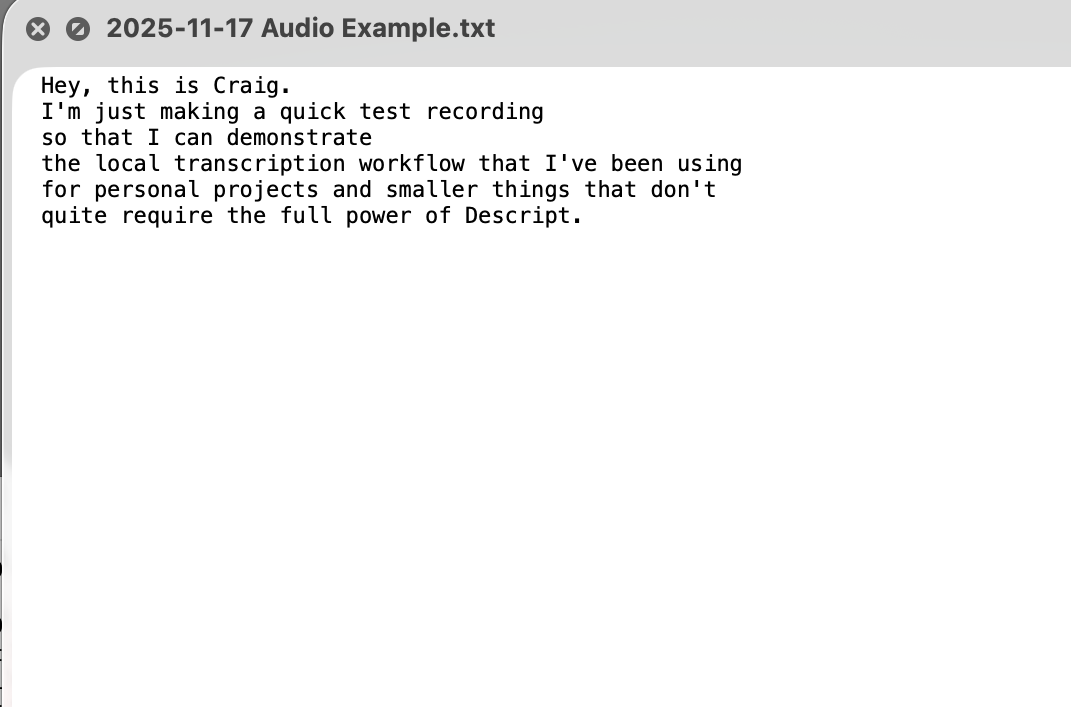
As you can see, the alias you just made will create two text files alongside your audio file. The first is just a dump of the transcript—usually lacking punctuation, paragraphs, and capitalization.

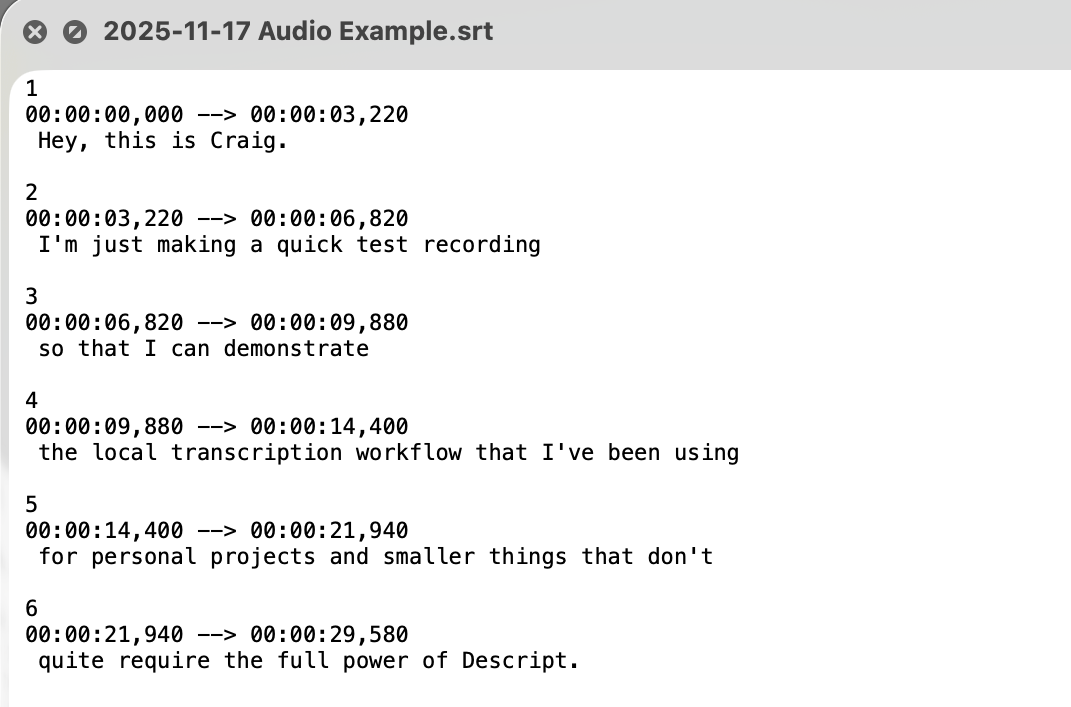
The second one is an SRT file. These are files that were originally made to create subtitles for video, but they present the text as well as timestamps in a very readable format.

Et voila! Now you can have some quick, free transcripts for your audio files.
If you want to know exactly what is going on here, and think about ways you might modify the transcript alias for your own workflow, keep reading for the nerdy details.
The Nerdy Details
The transcribe alias that we created has 4 steps.
FILE=$1
This simply saves the name of the file that we dragged into Terminal. As you'll see below, this comes in handy later when we name the text files that the whisper-cli produces.
ffmpeg -i "$FILE" -acodec pcm_s16le -ar 16000 "temp.wav"
The second thing we need to do is make a copy of our audio file and convert it to something that whisper-cli can read. Because this tool is optimized for speed, it requires audio files that are 16-bit (as opposed to 24- or 32-bit float). Just in case our file isn't recorded that way, we'll make a copy in that format called "temp.wav"
whisper-cli -m $MODEL -otxt -osrt -of ${FILE:r} "temp.wav"
This is where the transcription happens. This tells the whisper-cli to use our model and to make two text files: text and SRT. It also tells the CLI to name our new files with the same name as our audio file, to keep things tidy. And the file we want to transcribe is our new "temp" file. If you want to know about all of the options for this CLI, you can check them out here.
rm temp.wav
Finally, we just delete the temp file, leaving our original file in place.